Showing posts with label recipe. Show all posts

Friday, 10 July 2015

Five Favourites: Summer Salads


We're coming towards mid-July and I've suddenly realised over half the year has disappeared. Um how did that happen exactly? Good thing is, we're well into summer and also into the (in my opinion) best season for produce. There are so many delicious fruits and vegetables in season in these months, it makes having salads an absolute treat that just isn't quite the same in winter. I've definitely been enjoying some recently so I thought I'd share a few of my favourites, some of which are even better going into autumn to use all the upcoming seasonal veg...


Photo and recipe from Deliciously Ella
1. Aubergine, sun-dried tomato and pine nut salad from Deliciously Ella
I love sun-dried tomatoes, and I go through regular phases of being pretty obsessed with roasted aubergine so this is a dream. The chunky veg makes for a surprisingly filling salad and the tomatoes and pine nuts give this the most amazing flavours. Very moreish!
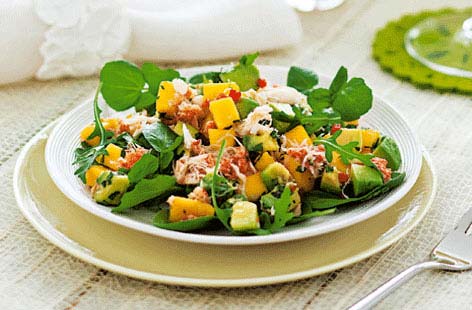


Photo and recipe from Tesco Real Food
2. Crab (or prawn), mango and avocado salad from Tesco Real Food
I cannot describe how incredible this tastes. The first time I tried this, we made it as a starter for a dinner party and I absolutely feel in love with the flavours. Anything that contains avocados is always an instant hit with me but with the chilli, lime and mangoes? Absolutely heavenly! I've never actually done this dish with crab, I've used prawns but I've been assured both tastes incredible and so light. Perfect for summer.


Photo and recipe from BBC Good Food
3. Feta tabbouleh and aubergines from BBC Good Food
Sorry, it's the aubergines again! But combined with feta gives this dish a bit of a greek flavour. Maybe not a salad in the traditional leaves-sense, but definitely a delicious cold dish which can be enjoyed in the sun. 


Photo and recipe from Minimalist Baker
4. Kale salad with crispy chickpeas from Minimalist Baker
If someone said food porn to me, this photo is basically what I would imagine. Baked chickpeas are my fairly newly discovered favourite snacks and additions to meals. Add them to the superfood kale, and you automatically have a winner. So yum. 


Photo and recipe from Cookie + Kate
5. Caprese pasta salad from Cookie + Kate
I don't think there is actually a combination more heavenly than perfectly ripe summer tomatoes and basil. I actually prefer this pasta salad cold, and I've also tried feta instead of mozzarella which is pretty incredible. Either way is delicious though, and so simple and quick. Kate is onto a winner with this one!


What are your favourite foods in summer? Comment below if you know of any great recipes!


Friday, 19 June 2015

Five Favourites: Smoothies

Happy Friday everyone! Today's Five Favourites are my top smoothie choices. I like to play around with recipes depending on what I actually have in the fridge/freezer but these are definitely firm favourites for me. All healthy, delicious and thick treats which are sure to get your day off to a good start! I love topping mine with leftover fruit, and/or seeds. Some of these don't require more unusual ingredients like chia or flax seeds, although I've found that buying these in means I have them on hand for a great breakfast boost and they last me ages!


Fit Foodie Finds
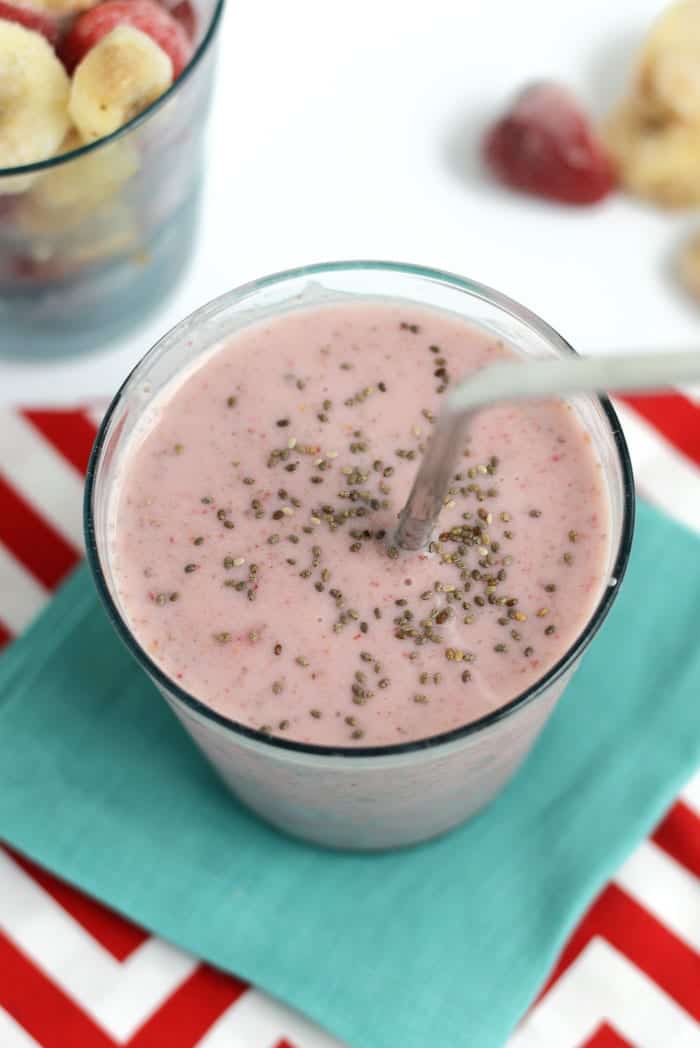
Creamy Strawberry Chia Smoothie from Fit Foodie Finds. Super creamy and yummy. The chia seeds can be left out, just be aware that they help to thicken it up a bit.


Simple Green Smoothies
Mango Green Smoothie from Simple Green Smoothies. Get your greens in with this one and you won't even taste it. Mango is one of my favourite fruits so this definitely brings a great start to my mornings!


Martha Stewart
Blueberry Banana Smoothie from Martha Stewart. This is incredibly easy and only has three ingredients. Quick, simple and failsafe with the perfect combination of blueberries and bananas.


Deliciously Ella
Cacao, Banana and Avocado Smoothie from Deliciously Ella. Always my go-to site for any kind of healthy recipe, Ella nails combining sweet, dessert-like flavours with a nutritious kick. 


Minimalist Baker
Summer Berry Smoothie from Minimalist Baker. Perfect for summer with all those berries coming into season. If I had a swimming pool, this is what I would sip on lounging in the sun.


I hope something's caught your eye here! All of these websites are great for finding other healthy recipes, whether you're looking for meal ideas or healthy snacking options. Do you have a favourites smoothie recipe? Let me know below! 

Tuesday, 13 May 2014

Light Chocolate Cake

Thought I’d do the second cake as a separate post to enable easier searches. Making my brother’s cake may have contributed to the highest stress levels I have ever experienced when baking. I was so nervous about the outcome. He’s fussy; as in likes-chocolate-cake-but-only-one-type-of-chocolate-cake fussy. This one type of chocolate cake seemed utterly impossible to recreate. It’s from our local bakery but is the richest, most sickly chocolate fudge cake ever and after numerous searches on-line for something similar, I had to compile my own ideas into a new recipe. But do you know what his verdict was? HE PREFERRED IT! I don’t think I’ve ever heard words so golden! 

The sponge itself was perfectly chocolately, and definitely not in a sickly way which was perfect for everyone else who wanted a slice and didn't want to feel queasy. But no matter how hard I tried, I could not find the kind of fudgey, gooey icing I was searching for without the use of cream (which he was quite adament he didn't want- difficult customer). This turned out to be a good thing because it stopped the cake from being too sickly. So, if you're looking for cake that's moist and chocolately, but still light enough to eat a whole slice, here's the recipe: 

(find the original here, thanks Mary Berry! Here video tutorial is especially useful)


Ingredients-

2 oz (50g) cocoa
6 tablespoons boiling water
3 eggs
2 tablespoons milk
175g self raising flour
1 rounded teaspoon baking powder
100g baking spread, I used Stork
250g caster sugar
50g dark chocolate, melted
30g milk chocolate, melted


(For the icing and filling)
Batch of buttercream (enough to fill, and cover an 8" cake)
1 tbsp cocoa powder
30g milk chocolate, melted
30g dark chocolate, melted

Method-

1. Pre-heat the oven to 180°C/160 fan/Gas 4 and prepare two 20cm (8") cake tins.
2. Measure the cocoa and boiling water into a large bowl. Mix together until it reaches a smooth paste-like consistancy.
3. Add the remaining ingredients and beat again until combined. After melting your two chocolates, either over a pan of simmering water (without the bottom of the bowl touching the water!) or with intermittent bursts in the microwave, leave to cool slightly. When the chocolate has cooled, stir it through the mixture until combined.
4. Divide the cake mixture between the two tins. Put in the oven for about 30 minutes until well risen and you see it pulling away from the sides of the tin. Leave to cool.
5. After making your batch of buttercream, melt the dark and milk chocolate separately and leave both to cool slightly. Add cocoa powder to buttercream and stir through. Then add the two chocolates and beat until all combined. Spread over the first sponge, put together and then ice the top. Enjoy! 


Let them eat cake

Easter weekend was pretty inconveniently timed this year and was over my mum’s and my brother’s birthday so not only were we busy present-buying and celebrating but it meant that my desire to back an Easter cake this year was met by two family members who were also hungry for their own birthday cakes too. But instead of going overboard and doing three cakes over one weekend, I settled for two and my mum’s doubled up as the Easter cake too. So first up the Lemon Drizzle, minus the loaf tin, plus some buttercream. Find the original recipe here, and my altered recipe below…

Ingredients-

Zest of 1 lemon, plus half the lemon for juice
1 tsp vanilla extract
225g baking margarine (I used Stork)
225g caster sugar
4 free range eggs, beaten
225g self raising flour
1 tsp baking powder
1 tbsp milk
Bag of mini eggs, or other decoration of your fancy

(For the lemon buttercream, to sandwich)
Batch of plain vanilla buttercream- enough to fill one cake
Half of the lemon for juice (plus extra if you feel it necessary)

(For the lemon syrup, quantities for covering just one half- obviously double up if you want to do both)
2 tbsp demerara sugar
Juice of one lemon

Method-

1. Preheat the oven to 180°C/fan 160°C/Gas 4 and prepare two 20cm sandwich cake tins and line the bases with baking paper.   
2. Put the lemon zest, vanilla, baking margarine and sugar into a large bowl and beat until pale and fluffy.
3. Gradually add the beaten eggs with a little of the flour, mix and then repeat until all the egg is gone. Fold in the rest of the flour and the baking powder, make sure not to overbeat! Finally add the milk and then spoon equally into the two tins.
4. Bake for 25 minutes. This is approximate because I waited until it had risen and was coming away from the sides of the tin. I also turned up the oven an extra 10 degrees towards the end for a few minutes to produce the gorgeous golden-brown colour on top. 
5. While the cake is still warm, poke holes in the cake with cocktail sticks. Mix together the demerara sugar and lemon juice until the sugar looks as though it's beginning to disssolve. Pour over the cake (one or both, depending on what you fancy- I did both and it gave it a wonderful texture), aiming it around the holes so that it sinks in.
6. Leave to cool and remove them from the tins. When completely cool, peel off the baking paper from the bottom.
5. Make your batch of buttercream (sorry for not putting something more detailed here- I don't think I have ever measured quantities of buttercream, I just add and taste until it's tasty and I have the right amount!) and mix in the lemon juice. I went for quite a weak taste here because of the already lemony sponge and syrup. When the cakes are cool, spread the buttercream onto one of the cakes, placing the other one on top when you've finished. Use any leftover to blob on the top with a piping bag and top with your decorations of choice.


Sunday, 9 March 2014

Coffee cake


Being one of my Dad's favourites, I have wanted to try a coffee cake for a long time and I found a perfect (and pretty straight-forward) recipe from the wonderful Mary Berry that drew me into the kitchen. 

I have to say it was successful, despite my doubts. Below is the recipe I followed, plus the link to the original page. I did alter the coffee-flavouring for the buttercream a bit, and I decided not to bother with the four separate layers but it tasted great anyway. The mixture did look seriously runny to me at first, but I decided to put my trust in Mary Berry, and of course it paid off. I was left with a beautifully moist, but suitably airy, perfectly coffee-flavoured coffee cake.

Original recipe here. (even includes a handy aga-cooking guide)

Ingredients-
225g (8oz) very soft butter, plus more for the tins
225g (8oz) caster sugar
225g (8oz) self-raising flour
1 tsp baking powder
4 large eggs
4 level tsp instant coffee, dissolved in 1 tbsp boiling water

(For the buttercream, if you are doing four layers)
175g (6oz) soft butter
350g (12oz) icing sugar
3 level tsp instant coffee, dissolved in 1 tbsp boiling water

Method-
1. Preheat oven to 180C (160C for fan) and prepare two 20cm (8in) sandwich tins.
2. Place all of the cake ingredients into a bowl, apart from the coffee, and mix until smooth in texture. Add the coffee and stir in until all blended (it will look a bit too runny, but that turned out to be fine!)


3. Divide the mixture between the two tins and bake for 25-30 mins (according to the original recipe but mine were in for about 35, when an inserted skewer came out clean and the sponge bounced back from the touch).
4. Leave the sponges to cool and make the buttercream. Combine butter and sugar until smooth and then stir in the coffee mixture.
5. Spread in between layers, and on the top if you wish. I dusted with icing sugar because I didn't make enough buttercream to cover the top as well, I'll be making more in future!
6. Eat it and enjoy! Nom, nom.


Sunday, 9 February 2014

Cookie success (against all odds)

I don't get much baking done in France, which saddens me because I just love to bake (and then eat it all afterwards, obviously). The 'oven' we have is one of those microwave-ovens and I don't trust them at the best of times. On top of that, the instructions are all in French. I tried shortbread a couple of months back and ended up with a melted mass of butter, sugar and flour. My flapjacks went a little better last month, but still ended up burning on the bottom. 

But I think I've cracked it! I finally found a setting which cooked something properly! I had leftover chocolate, flour, sugar and golden syrup in my room and following an edited eggless cookies recipe ended up with these beauties:

Eggless chocolate chip cookies

Here's the recipe (altered slightly from smokingviper1's recipe on allrecipes.co.uk, find the original here):

Ingredients- (supposed to make 18, mine came to about 14 with two tiny ones)
  • 100g margarine
  • 75g caster sugar
  • 180g self raising flour 
  • 100g chocolate chips
  • 1 tablespoon golden syrup
  • 2-3 tablespoons milk
Method-
1. Heat the oven to 180 C. Grease (or I floured) 1 to 2 baking trays.

2. Beat the margarine until soft, and add the sugar. Cream together until light and fluffy. (Having no electric beaters I did this by hand as best I could, which wasn't very creamy but they still turned out fine!)

3. Stir in the flour, chocolate chips, golden syrup and milk. I didn't have 2 tablespoons of golden syrup left like the original recipe states, so used one, and added in another dash of milk towards the end of mixing. 
Mix well, until it has the consistency of dough. I used my hands in the end because it was easier, and also showed me that my mixture was a bit too moist and too sticky and I was worried about ending up with a melted mass in the oven again. 
I sprinkled more flour into the mixture (I've added an extra 5g into the measurements of this recipe compared with the original) which also allowed me to shape it better.

4. Finally, place teaspoon-sized balls of the mixture on the prepared trays, gently flattening each one into the shape of cookies (note: they will spread out a little wider than this, so mine were about 5-6 cm across and over 1cm thick) and bake for 10-12 minutes, or until golden around the edges. Once cooked remove them from tray immediately and place them on a wire rack to cool. 

Treat yourself and eat one whilst they're hot- that's when they're best!

Tuesday, 20 August 2013

A Gooey Slice of Paradise...

I have long wanted to make a cheesecake as part of my baking venture, and being an avid New York cheesecake fan (especially the one from Waitrose- lush), I always imagined that I would start simply... Cue the deliciousness which is the white chocolate and strawberry cheesecake seen on UK morning programme, Lorraine, and the temptation to launch straight in was too much. And I am pleased to say, the risk did pay off! Since this was my first time making anything remotely like this, I struggled with how it was meant to look consistency-wise, and parts of the recipe were very simple and vague and left me at a bit of a loss. However, although it could have been more solid overall, this was absolutely incredible as a sweet treat. A very sweet treat considering the amount of cream that went into it... Here's how to make it: 

Ingredients:
230g digestive biscuits
80g unsalted butter melted
200g white chocolate (proper cooking chocolate is best as white choc can often be temperamental)
400g mascarpone cheese
100ml sour cream
300ml double cream
80g caster sugar
1 tsp vanilla extract

Method:
1. Crush the biscuits to fine crumb in a food processor, or with a rolling pin. Mix in the melted butter until crumbs are all covered. Place the mixture into a buttered 23cm loose-bottomed spring form cake tin, compress down and chill in the fridge for 20 minutes. If you don't have a spring form tin, I put baking paper around the outside of my tin so it wouldn't stick.

2. Gradually melt the white chocolate in the microwave or in a bowl over a pan of gently simmering water and then set aside to leave to cool slightly.
3. Cream the mascarpone, chocolate, sour cream and sugar together along with the vanilla extract, until light in weight.

4. Whip the double cream to soft peaks then fold the two together. Set aside.
5. Halve the strawberries then place around the outside of the tin with the insides facing out. Place a few more in the bottom of the tin then cover with the cheesecake mixture, making sure to smooth it into the gaps. Chill for at least 1 hour to set (mine required about 2 in the end to set properly).

6. Remove from the tin then decorate with the remaining strawberries, and dust with icing sugar (optional).

Definitely give this a go, even if you're beginner baker like me. It was actually really easy and, the actual preparation time was fairly minimal. Plus, it's delicious. 
The finished result!

Tuesday, 16 April 2013

Happy Easter and Happy Birthday

Happy first birthday to Little Musings! So it was about this time last year that I started this blog and it’s been a wonderful little outlet for me (when I have the time to use said outlet) and it’s led me to look at some other really great blogging sites. I’m pretty sure one of the first posts I did was about my white chocolate Easter cake last year and so this post is going to seem like a little bit of a déjà vu, but with a little bit of a better twist. Yay to cake success!


I hope everyone has enjoyed their Easters, I certainly got far too many white chocolate orientated treats, as you can see! People know me far too well… (not that you see me complaining!) This long weekend business has completely fuzzled up my brain and I don’t know whether I’m coming or going, whether it’s Friday or Sunday! But it’s been fun! This year, I had another crack at the BBC Good Food’s white chocolate Easter cake but put my own twist on it. Since the white chocolate sponge was so hit and miss as to whether it went well or not (plus it was very heavy last year which resulted in a lot of sicky feeling), I decided to go for a plain sponge but mixed it up but stirring in crushed white chocolate. The sponge itself came out perfectly, in fact I think it’s my most lightest, fluffiest to date. And although there weren’t little bit of melted white chocolate as I had envisaged throughout, it had all sunk to the bottom in a nice, crunchy block. I covered with an amazing (seriously, like totally the best thing a white chocolate lover could ever discover) white chocolate buttercream which I found on this lovely site: http://www.4thsensecooking.com/2012/11/strawberry-cake-with-white-chocolate.html The consistency was perfect! Stiff peaks but also spreadable and then I topped with the classic Easter favourites, Mini Eggs. It was definitely one of my best ever cakes. Success!

White chocolate Easter cake- a success!
My second ‘baking’ attempts were cornflake cakes! Taking me back to my childhood, I cooked these treats up in no time. After putting more of the chocolate, butter, syrup mixture in that it originally said, I halved the mixture and stirred a melted mars bar through one which was one of my best brainwaves yet! I feel like I must have heard it somewhere before but it made them so gooey and chocolatey. A traditional favourite made all the more fattening… Sounds perfect to me!!

Somebody knows me too well...
My family deviated from the traditional Sunday Easter dinner this year, since the weekend before I had returned from university and we had the biggest roast dinner known to man… Seriously. I don’t think I’ve ever eaten so much… Anyway, so because we decided we probably couldn’t manage another huge one, we opted for a tapas themed buffet! I was actually really good, with different breads and dipping oils, olives, loads of chorizo because that’s my fave, stuffed peppers, cheeses, the lot. And some mini sausage rolls for my fussy brother, many of which I may have scoffed for myself too. I’m sure there’s no need for me to tell you that my keeping-the-weight-off-diet isn’t exactly going to plan, but I just lurrve food.